Stop monitor reflections and tired eyes with simple home office lighting fixes: place your screen perpendicular to windows, layer ambient + task + bias light...
Warm Lumen
DIY Bias Lighting for TVs and Mirrors

Lumi
Lumi is the friendly little firefly host of Warm Lumen, with a heart that glows as brightly as a perfectly placed pendant lamp. He loves discovering how soft bulbs, warm color temperatures, and layered lighting can transform any dark room into a welcoming retreat. Lumi is always fluttering by to share bright ideas and cheer you on as you create a beautifully lit space.
Published · Last updated
Let’s find the perfect glowing touch for two spots that love a soft halo: the TV wall and the bathroom mirror. LED bias lighting is one of the quickest DIY upgrades that can make a room feel calmer, cleaner, and more intentionally lit.
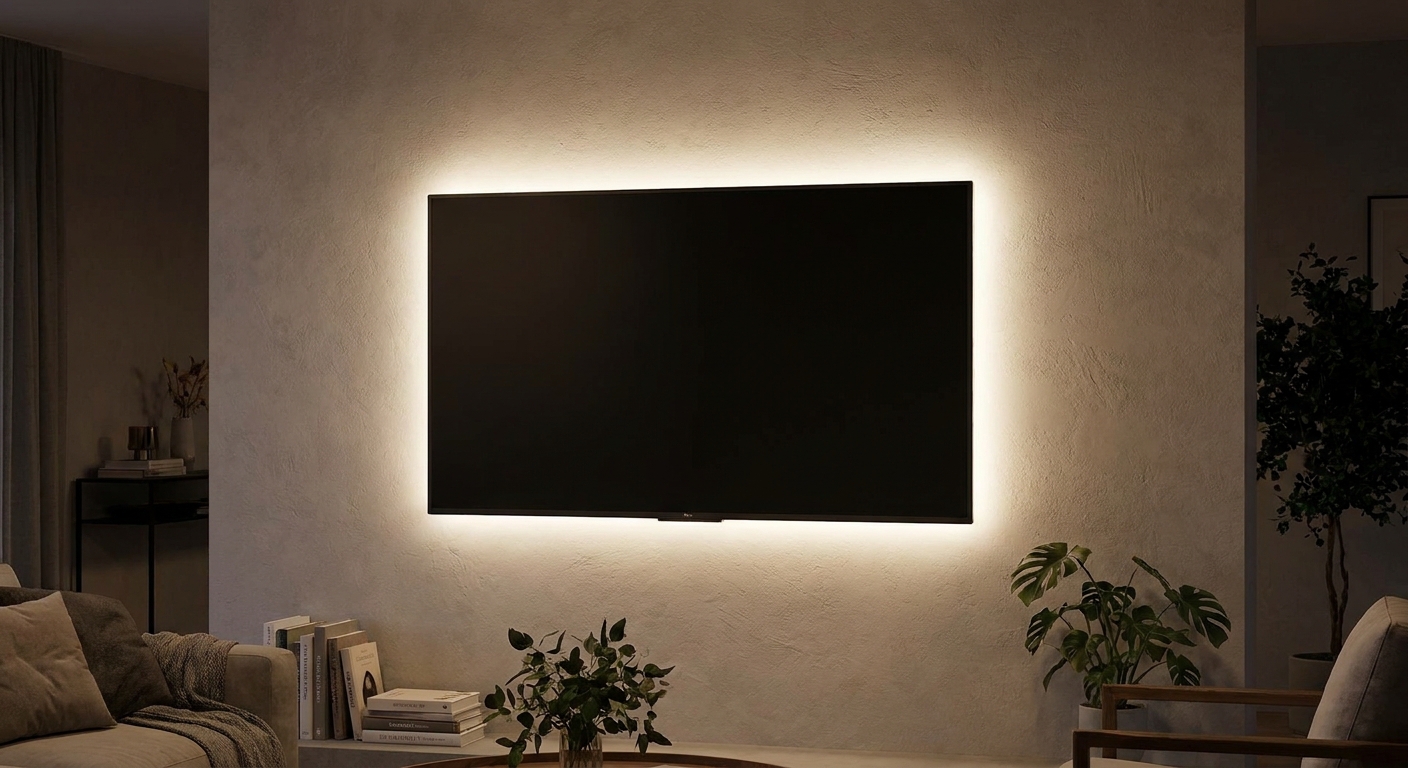
What bias lighting does (and why it helps)
Bias lighting is a strip of light placed behind a screen or mirror so the light bounces off the wall. That reflected glow helps your eyes adjust between a bright display and a darker room.
- For TVs: it can reduce perceived eye strain and harsh contrast when watching in a dim room.
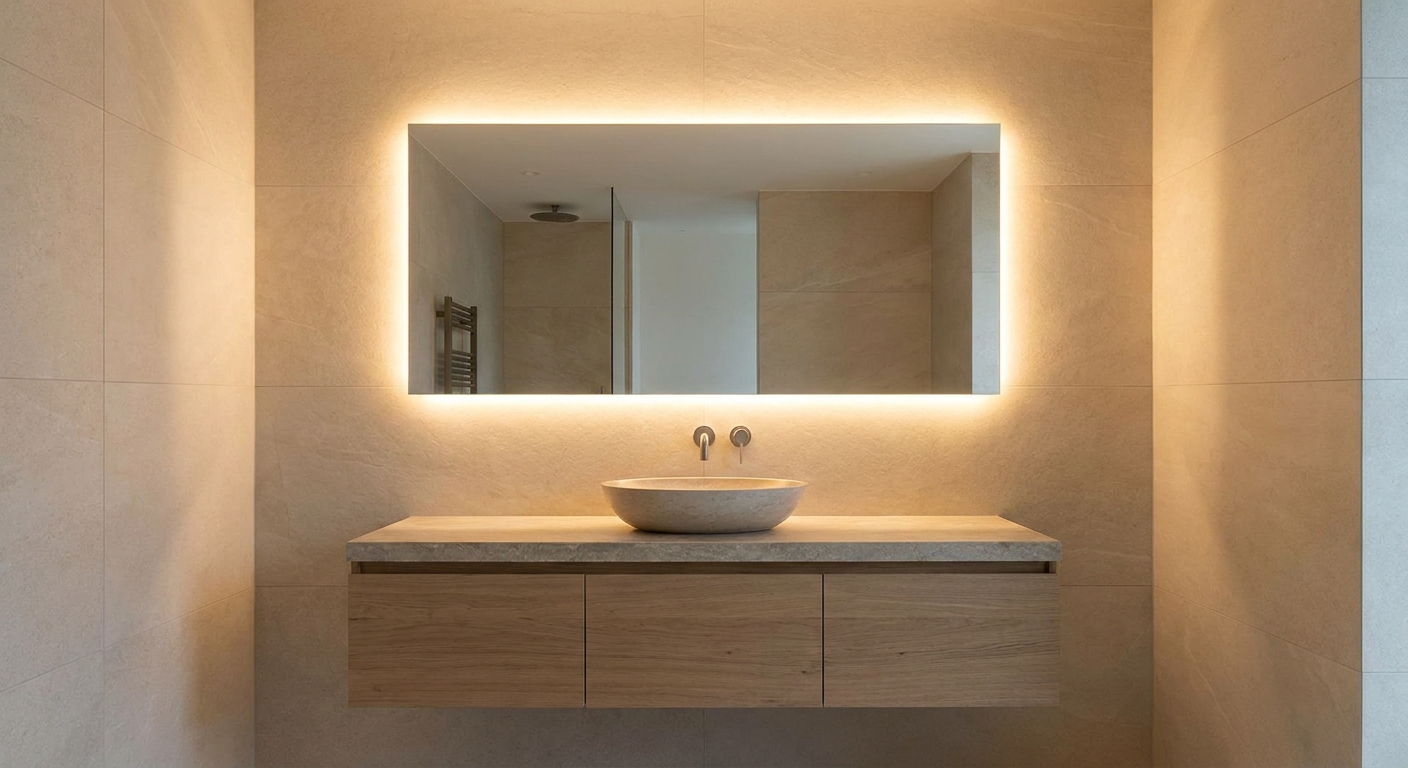
- For mirrors: it adds a modern “floating” look and softens the overall feel of the vanity area when paired with good front lighting.
Bias lighting is not a replacement for the main lighting in a room. Think of it as a gentle background layer. If you want a fuller layered plan (ambient, task, and accent together), visit Lighting Basics & Education.
Pick the right LED strip
TV: neutral, steady, dimmable
- Color temperature: For the most “true” bias lighting behind a TV, many home theater setups target D65 (about 6500K). That standard is most useful for color-critical viewing in a dim or dark room. For everyday comfort, a warmer strip in the 3000K to 4000K range can look more natural with typical home lighting, even though it is no longer “reference” bias lighting.
- Color accuracy (CRI): Higher CRI helps the wall color and nearby objects look more natural under the strip. It will not change the TV panel’s on-screen accuracy, but it can make the room itself look better. If you want a quick refresher, see CRI Explained.
- Dimming: Bias lighting should be adjustable. Brighter is not always better.
- Dot-free look: If you hate seeing individual diodes, look for a higher LED density strip, or a COB LED strip (it tends to look like one continuous line of light). A diffuser channel also helps a lot.
- Sync features: Some RGB kits can sync colors to on-screen content. They can be fun, but they also add complexity (and sometimes noticeable delay or flicker). A simple static white strip is the easiest daily win.
Mirror: warm, flattering, bathroom-appropriate
- Color temperature: Most bathrooms feel best with 2700K to 3000K for a cozy glow, or 3000K to 3500K for a cleaner, brighter look. For more help choosing, see Best Color Temperature for Bathroom Vanity Lighting.
- Damp vs wet rating: In many bathrooms and especially near a tub or shower, damp-rated or wet-rated fixtures may be required depending on placement and local code. LED strip kits vary widely. A silicone sleeve helps with splashes, but it does not automatically mean the product is suitable for every bathroom location or a permanent installation. Check the product listing, follow the manufacturer’s location guidance, and when in doubt, choose a safer location for the power connections. Warm Lumen’s guide to ratings is here: Damp vs Wet Rated Lights.
- Diffusion: Bare diodes can reflect in mirrors and glossy tile. A strip in a diffuser channel often looks smoother and more “built-in.”
USB, plug-in, or hardwired?
- USB-powered: Easy for TVs. Just note some TVs cut power to USB ports when off, which can make the backlight shut off too.
- Plug-in adapter: Most common. Great for mirrors and TVs if you have an outlet nearby.
- Hardwired: Cleanest look, but more involved. In bathrooms, hardwiring may trigger location rules, permits, or an electrician in some areas. If you are converting something to plug-in instead of hardwiring, this may help: Convert a Hardwired Sconce or Pendant to Plug-In.
Tools and supplies
- LED strip kit (strip + power supply + controller or dimmer)
- Measuring tape
- Scissors (only if the strip is marked “cut here” at your needed length)
- Isopropyl alcohol and a lint-free cloth (for prep)
- Painter’s tape (for test positioning)
- Cable clips or adhesive cord channels (for a tidy finish)
- Optional: diffuser channel, extra mounting clips, or stronger tape if your wall is textured
Adhesive tip: Many kits ship with tape that struggles with heat, dust, or textured surfaces. If you want it to stay put long-term, a channel with mounting clips is the most reliable, and upgraded tape (like a high-quality mounting tape) can help when a channel is not an option.
Safety note: LED strips are low voltage, but you should still follow the manufacturer’s instructions, avoid pinching wires, and keep power supplies ventilated. In bathrooms, keep plug connections and controllers out of splash zones and away from places where water can drip or pool.
Plan first
How much strip do you need?
- TV: Measure the perimeter of the back of the TV (or the mounting panel), then plan to run the strip inset 2 to 4 inches from the edge. Many people light three sides (top and two sides) to keep wiring clean, but all four sides can look extra even if your power lead placement works.
- Mirror: Measure the perimeter of the back of the mirror, or plan a frame-like rectangle on the wall behind it. Inset 1 to 3 inches from the mirror edge so the glow blooms around the mirror instead of peeking directly into view.
Do quick power math
Before you stick anything down, make sure the power supply can handle the strip length.
- Total watts = (watts per foot or meter) x (total length)
- Add about 20 percent headroom so the power supply is not running at its limit
- Match the strip voltage (often 5V, 12V, or 24V) to the power supply voltage
Decide where the light should bounce
The best bias lighting is reflected light, not a visible strip. Before sticking anything down, hold the strip in place with painter’s tape and turn it on.
- If you can see bright dots, move the strip farther inward, add a diffuser channel, or switch to a higher density or COB strip.
- If the halo looks patchy, check that the strip is not too close to the edge in one area and too far in another.
Install behind a TV
Step 1: power down
- Turn off the TV and unplug it.
- If the TV is wall-mounted, you may be able to work from the side. If not, carefully pull it out or remove it if needed.
Step 2: clean the surface
Most strip adhesive fails because of dust or texture. Clean the back surface where the strip will stick using isopropyl alcohol. Let it dry fully.
Step 3: do a dry fit
- Plan a path that avoids vents and inputs.
- Keep bends gentle. Many strips do not like sharp corners.
Step 4: stick the strip
- Peel a short section of backing at a time, press firmly, and continue.
- At corners, use a gentle curve if the strip allows it, or use corner connectors if your kit supports them.
Step 5: manage cords
- Route the power lead toward the nearest outlet.
- Use cable clips or an adhesive cord channel to keep things tidy.
Step 6: set brightness
Turn it on and dim down until the glow feels like a soft cushion behind the screen, not a spotlight. If you also use a dimmer elsewhere in the room, this guide can help prevent flicker issues: How to Fix LED Flicker With the Right Dimmer.
Install behind a mirror
Before you start: moisture and placement
- Confirm the strip and power supply are appropriate for your bathroom location per the manufacturer’s instructions.
- Keep drivers, controllers, and plug connections in a dry, ventilated spot, away from splash and steam concentration.
Option A: strip on the mirror
- Remove the mirror if possible, or work from the sides if it is already spaced off the wall.
- Clean the back surface with isopropyl alcohol.
- Place the strip inset 1 to 3 inches from the edge so the diodes are not visible from the front.
- Test the glow before final pressing, especially in a darkened bathroom.
- Rehang the mirror and tidy the cord route.
Option B: strip on the wall
- Mark a rectangle behind the mirror area, inset slightly from the mirror edge.
- Clean the wall where the strip will stick.
- Mount the strip and test for even glow.
- Reinstall the mirror so it hides the strip.
Backlight vs face light
Mirror backlighting looks magical, but it is not the same as face lighting. For grooming tasks, you still want light that reaches the face from the front, ideally from the sides of the mirror or an evenly diffused fixture above. If you are planning the whole vanity setup, start with Calculate the Right Lumens for Any Room to get your overall brightness in the right zone, then fine-tune the vanity color temperature with this bathroom vanity guide.
Make the glow look built-in
- Hide the dots: keep the strip out of direct sightlines and consider a diffuser channel or COB strip if you have glossy surfaces.
- Give it space: an inch or two of distance between the light source and the wall helps the halo spread evenly.
- Avoid hot spots: do not bunch extra strip length in one area. Cut only on the marked cut points, or choose a kit with the right length.
- Match the room’s warmth: a very cool TV bias light can look out of place in a warm-lit living room. It is fine to choose harmony over perfection.
Troubleshooting
The strip keeps falling off
- Re-clean with isopropyl alcohol and let it dry.
- Press firmly along the whole run, especially at corners.
- Use mounting clips or a channel if the surface is textured or warm.
The glow is uneven
- Make sure the strip distance from the edge is consistent.
- Move the strip slightly inward to widen the halo.
- Check for blocked sections behind brackets or TV mount arms.
Flicker or buzzing
- Confirm the power supply matches the strip’s voltage and wattage needs.
- If dimming is involved, use a compatible dimmer or controller. This guide can help: How to Fix LED Flicker With the Right Dimmer.
The mirror light looks harsh
- Switch to a warmer color temperature.
- Add diffusion.
- Lower brightness and let your vanity lighting do the main work.
Brightness and color basics
Every room is different, but these are cozy starting points:
- TV bias lighting: dim to a soft halo that does not pull attention away from the screen.
- Mirror backlighting: bright enough to outline the mirror, but not so bright it becomes the main bathroom light.
If you want to sanity-check how much total light a room needs, see Calculate the Right Lumens for Any Room. It helps keep accent lighting in its happy supporting role.
FAQ
Can I put LED strips behind any TV?
Most flat TVs work great, as long as you avoid covering vents and you have a safe path for power. If the TV is very close to the wall, the halo can be tighter and more intense. Moving the strip inward and dimming usually solves it.
Do I need RGB color-changing strips?
You can, but you do not have to. A simple white strip often looks the most timeless. RGB can be fun for gaming or parties, but white is the easiest to live with every day.
Is mirror backlighting enough for shaving or makeup?
It helps with ambiance, but it is not a substitute for good face lighting. For best results, pair it with vanity lighting that shines toward the face.
Will adhesive ruin paint?
It can, especially on fresh paint or delicate finishes. If you are worried, use a channel with removable mounting methods, or mount to the back of a TV or mirror frame where paint is not involved.
Final glow check
Bias lighting works best when it is subtle. Aim for an even halo, gentle brightness, and a color temperature that matches the mood you want. The best light does not shout. It just makes the whole room feel easier to be in.
If you’re collecting more small upgrades like this, browse DIY & Easy Upgrades.